
Did You Accept My Challenge?
I wonder if anyone accepted the challenge I posted here? I hope so! If you did, tell me about it in the comments or email me (miaismine22@gmail.com). I'd love to hear about your experience!
Give it a shot if you haven't already.
These lyrics really encouraged me. So, I decided to deviate a bit from our study of Philippians to share a bit about them and how they encouraged me!
via GIPHY
God is on the
Move Lyric Study
Any time a heart
turns from darkness to light
Any time
temptation comes and someone stands to fight
Any time somebody
lives to serve and not be served
I know, I know, I know, I know
God is on the
move, on the move
Hallelujah God is on the move In many mighty ways God is on the move, on the move Hallelujah God is on the move On the move today |
I wonder,
has your heart
turned from darkness to light? Have
you had the privilege of witnesses someone’s radical change in their lives?
Or perhaps you or
someone you know has stood up to fight temptation? I know someone who stand and fights
victoriously EVERYDAY! He amazes
me. You know who your are….
How many times
have you served instead of been served?
That is the majority of the loving quilting community I’ve been
privileged to know. You have hearts of
gold. You are my blessing.
I need only
remember the one who stands and fights and you all to know God is on the
move!
What about you? I’d love to hear about your experience! Please let me know in the comments or email at miaismine22@gmail.com! |
Publishing: Love Journey Music, Moms Like Us Too, Aevinesaintmusic, Promotion And Relegation Music, Sony/ATV Cross Keys Publishing, Songs From Exit 71 (SESAC)
Writer(s): Mikey Howard, Cliff Williams, Ian Eskelin, Tony Wood
A Mini Tutorial For
A Portable Sewing Kit
updated: 4/6/17
Thank you, Susan, for mentioning the magnets! I totally forgot to finish the tutorial! Sighhhh, I must be getting old! :) Scroll down to see the "rest of the story"!
I bet most of you enjoy taking
your hand sewing projects
with you whenever
you leave your home.
I do.
I always have a selection of projects that
I can grab and go at a moments notice!
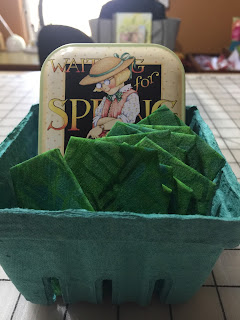
A good friend gave me a tin that has become my "go-to" tool!
It only took about five minutes
to put together!
Here's how I did it!

Gather your materials:
a metal container,
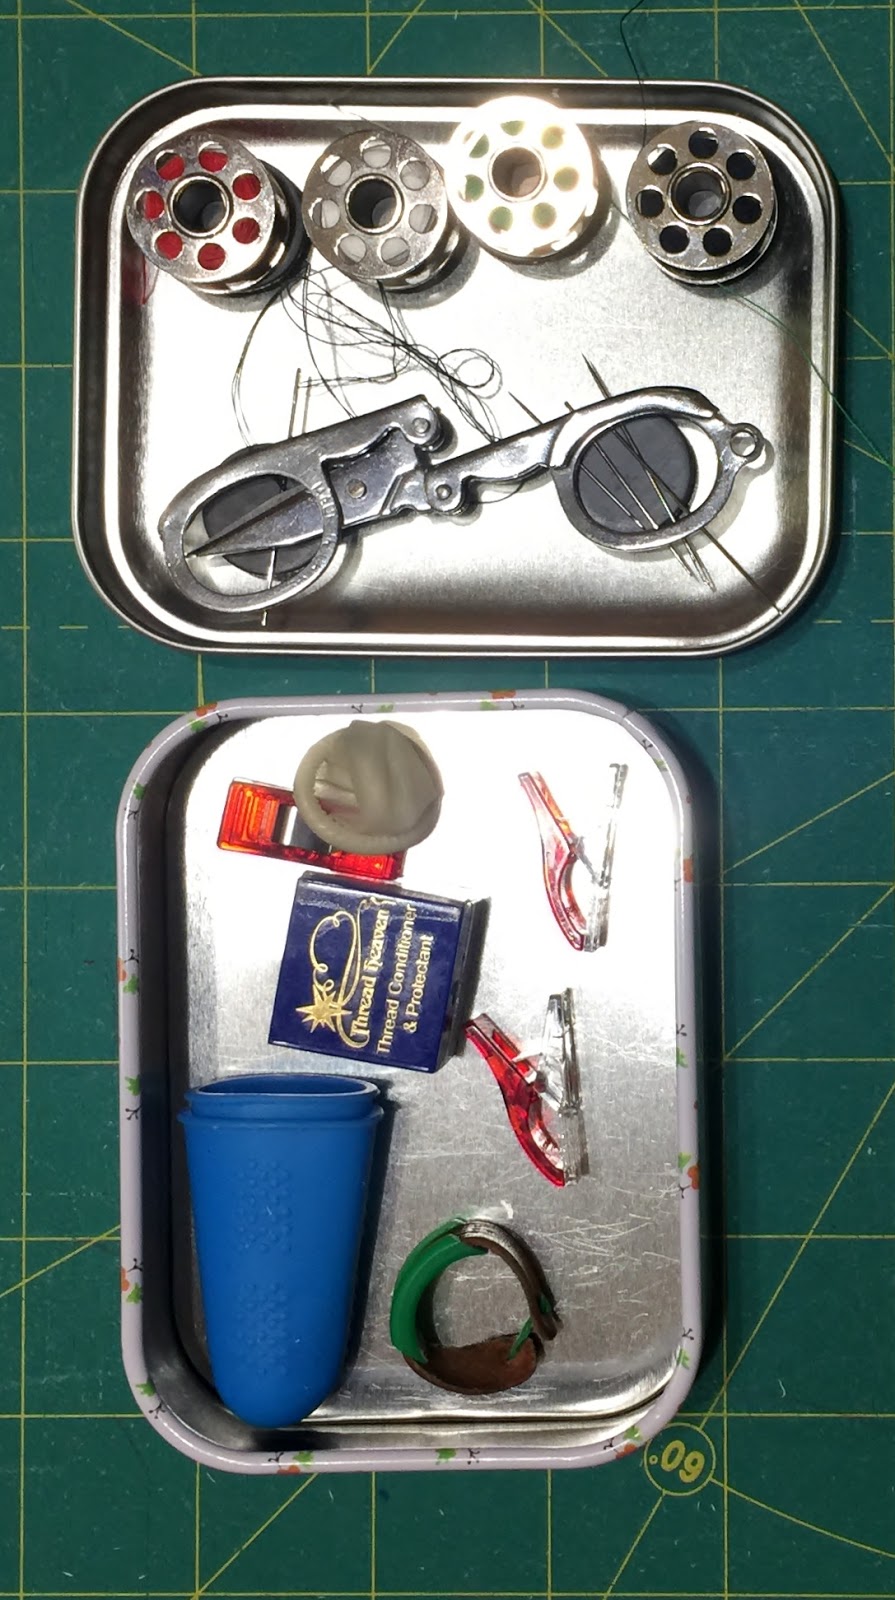
extra metal bobbins filled with thread,
one magnet for each bobbin
plus 2 additional magnets,
needles,
small folding scissors,
whatever thimbles you use,
a finger cot,
a couple of Wonder Clips
and, of course,
Thread Heaven!
Thread Heaven makes my
hand sewing experience "heavenly"! :)
Is there another tool that you add to
your portable sewing kit that I missed?
I'd love to hear about it!
Please let us know in the comments!

Place the thimbles, Finger Cots,
Wonder Clips and Thread Heaven
in the base of your tin container.

Then, add some magnets to your lid.

I use them to hold my bobbins filled with the colors of thread I need at the time,

as well as my needles and scissors!
Perfect for my Fabri-Flair project!


Then, add some magnets to your lid.

I use them to hold my bobbins filled with the colors of thread I need at the time,
as well as my needles and scissors!
Perfect for my Fabri-Flair project!

Charity Sewing
Just a reminder about Covered In Love's block drive! Here is the tutorial for these fun 3D blocks! Here is where I wrote about them and offered some tips for the "nervous about 3D blocks" group!

I loved learning how to make them! Wouldn't they make a fun baby quilt with those 3D blocks?
You blocks look so good! Thanks for linking up!
ReplyDeleteThank you for the fabulous tutorial! I love how the blocks looked woven! Great idea!a
DeleteThose blocks would make a great baby quilt! And the tin is adorable - thanks for sharing!
ReplyDeleteThank you! I appreciate you hosting the party and commenting!
DeleteMy sewing kit is a little housewife my daughter gave me about 20 years ago. Mine includes a small, round, metal container for pins; a seam ripper; two bobbins with thread, and another if I need a specific color; a pair of small scissors; and a few needles. I think that's it. You can see it at http://joyforgrace.blogspot.com/2013/07/a-housewife.html. But, I use a tin like yours -- several, actually -- for pins. I have one on my sewing machine and one where I sit to stitch in our family room.
ReplyDeleteVery nice! Your kit sounds awesome! I went to your link and even did a bit of quick research on them! Guess what? I made one of those as well! I think a post about portable sewing kits may be in my future! Thank you so very much for sharing!
DeleteI also put a small square of felt through which I've stuck some straight pins. I also park my needle (threaded or not) in the felt square.
ReplyDeleteI've seen some kits, such as this, have a cut-to-fit magnetic sheet glued to the inside of the lid. You can "stick" your pins and needles there.
I didn't know about magnetic sheets until after I made my own kit. Instead, I made a "pin cushion" that fit the inside of the lid. I glued it in place. That's where I stick extra pins and needles. However, you need to be careful not to make this lid pin cushion TOO fat otherwise the lid won't close! I learned that the hard way. LOL!
To keep the tails of the thread in the bobbins in place, I put a "baby's pony tail holder" around them. I found them in the hair products aisle of a drug store (or Target or Walmart, etc). They come lots in a package. They look like bit, fat Cheerios made from a stretchy fabric. They fit right around the bobbin. You can even still pull the tail out without needing to remove the pony tail holder.
Oh Shelley! Thank you for visiting! After perusing your blog, I just had to subscribe! Thank you for the hints! I never used the "baby pony tail holders" because I thought it would be a hassle - until I read your comment! Guess what I'll be purchasing? Thank you for stopping by and commenting!
ReplyDeleteThanks for a great idea. I'm not sure why so many magnets, but I'll be looking for some cute tins!
ReplyDeleteGood point, Susan! It appears I left out the last part of the tutorial! Thank you! :) I'll have to update that!
Delete